How to Set Up Podcast Equipment for Studio-Quality Sound
- Bryan Wilks
- Jan 24
- 12 min read

Alright, before we get into the nitty-gritty of plugging things in, you've got to have the right gear. Your show's audio quality lives and dies by the equipment you choose. It's easy to get overwhelmed by tech specs and fancy features, but the real goal here is simple: capture your voice with warmth and clarity.
Choosing Your Core Podcasting Gear
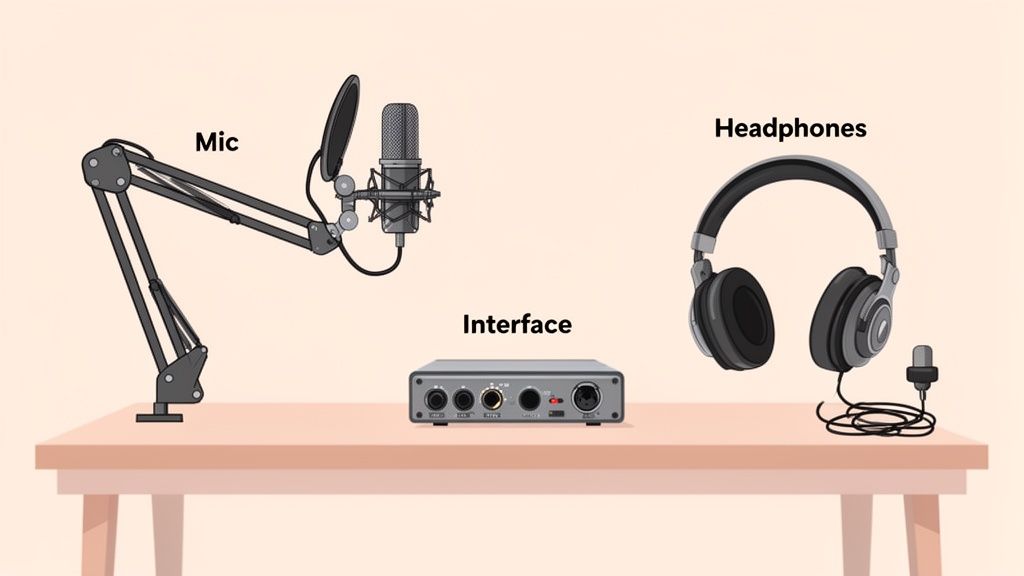
The whole journey starts with your microphone. Honestly, it's the most critical piece in your entire audio chain. A solid dynamic mic like the Samson Q2U is a fantastic starting point for most people. Why? Because it’s built to reject background noise, making it a lifesaver if you’re recording in a less-than-perfect space like a spare bedroom or home office. That focus on vocal isolation is what gives you a clean track to work with.
Next up, you need a way to get that beautiful audio from your mic into your computer. This is where an audio interface or a mixer enters the picture. An interface, like the super-popular Focusrite Scarlett 2i2, is basically a translator—it converts the analog signal from your XLR mic into a digital one your software can understand. Mixers give you more hands-on control, especially if you plan on having co-hosts or guests.
Finally, you can't fix what you can't hear. A good pair of monitoring headphones is completely non-negotiable. I'm not talking about your everyday earbuds. Studio headphones give you a flat, honest sound, letting you catch annoying background hums, plosives, or distortion while you're recording, not after.
Key Accessories That Make a Difference
Beyond the big three, a few small accessories can elevate your setup from feeling amateur to sounding polished. A pop filter or windscreen is a must. It softens those harsh "p" and "b" sounds (called plosives) that can make your audio practically unlistenable.
A boom arm is another absolute game-changer. It gets the mic off your desk—reducing vibrations—and lets you position it perfectly for your voice. It’s no surprise that 70% of podcasters use one; they just make life easier.
Now, let's talk budget. A solid beginner setup can run you under $300, while a more professional rig can easily climb from $1,000 to $2,500. For a detailed look at some great entry-level options, you should definitely check out our guide on the best podcast equipment for beginners.
Essential vs. Professional Podcast Gear
Deciding where to invest your money can be tough. This table breaks down what you absolutely need to get started versus what you'll want as you grow.
Equipment Type | Beginner (Essential) | Professional (Recommended) |
|---|---|---|
Microphone | USB Mic (e.g., Samson Q2U) | XLR Condenser/Dynamic Mic (e.g., Shure SM7B) |
Audio Interface | Not required with USB mic | Multi-channel interface (e.g., Focusrite Scarlett 2i2) |
Mixer | Not required for solo host | Required for multiple hosts (e.g., RODECaster Pro II) |
Headphones | Any closed-back headphones | Studio Monitors (e.g., Audio-Technica M50x) |
Mic Stand | Basic desk stand | Boom Arm (e.g., Rode PSA1) |
Accessories | Pop filter or windscreen | Shock mount, quality XLR cables |
Acoustic Treatment | Blankets, pillows | Acoustic panels, bass traps |
Think of the "Beginner" column as your launchpad. It’s more than enough to produce a high-quality show. The "Professional" column is where you go when you're ready to fine-tune every aspect of your sound for that top-tier, broadcast-quality finish.
Putting It All Together: Your Audio Signal Flow
Alright, you’ve picked out your gear. Now for the fun part: making it all work together. This is where we map out your signal flow—that's the journey your voice takes from your mouth, through the mic, and into your computer.
Think of it like plumbing. Your voice is the water, the mic is the tap, and the computer is the drain. Every cable and connection is a pipe. One leaky joint can mess up the whole system, so getting this right from the start is crucial for a clean, professional sound.
The Big Split: XLR vs. USB Mics
The type of mic you bought is the single biggest factor in how you'll connect everything. There are really only two paths here.
If you went with a beginner-friendly mic, it's probably USB. This is the express lane—a direct, plug-and-play connection right into your computer. Simple and effective.
On the other hand, if you've got a more professional-grade microphone, it almost certainly uses an XLR cable. This is the beefy, three-pin connector you see in music studios. An XLR cable can't plug straight into a computer. It needs a middleman, like an audio interface or a mixer, to translate its rich analog signal into digital 1s and 0s your computer understands.
The Bottom Line: An XLR setup has more pieces but gives you far better sound quality and the flexibility to add co-hosts or other inputs later. A USB setup is all about speed and simplicity, perfect for getting your first episodes recorded without any fuss.
The USB Mic Setup (The Easy Route)
If you're rocking a USB mic like the incredibly popular Samson Q2U, your setup will take about 60 seconds. Seriously.
Pop on the Windscreen: First thing's first, slide that little foam ball over the top of the mic. This is your secret weapon against those harsh "p" and "b" sounds (plosives) that can ruin a take.
Plug in the Mic: Connect the small end of the USB cable to the bottom of the microphone and the standard USB-A end into a free port on your computer.
Connect Your Headphones (Critically Important!): Do not plug your headphones into your computer. Plug your wired headphones directly into the 3.5mm jack on the microphone itself. This is the key to hearing yourself in real-time with zero delay, which is essential for sounding natural.
Flip the Switch: Most USB mics have an on/off switch. Flick it to "ON." Your computer should chime and recognize it as a new audio device almost instantly.
The XLR & Interface Setup (The Pro Path)
Did you go with an XLR mic and an audio interface like the workhorse Focusrite Scarlett? The process just has one extra step, but it’s the foundation of virtually every professional studio.
First, grab your XLR cable and connect your microphone to the first input on your audio interface. You’ll hear a satisfying click as it locks in on both ends.
Next, take the USB cable that came with your interface and plug it into your computer. For most two-channel interfaces, this one cable handles both power and data. No extra power bricks needed.
Finally, plug your headphones into the headphone jack right on the front of the interface. This setup lets you hear everything—your own voice from the mic and any audio coming from your computer, like a remote guest or background music. You're in complete control.
Configuring Your Software and Setting Perfect Levels
With all your gear plugged in, it's time to get your computer and recording software talking to each other. This is the moment you step into your DAW, or Digital Audio Workstation, which is just a fancy term for the program you'll use to record and edit. Think of it as the mission control for your podcast.
When you first open up your software—whether it's the free and powerful Audacity or a pro tool like Adobe Audition—your first stop should be the audio settings or preferences menu.
You’re looking for two key options: Input Device and Output Device. For the input, simply select your USB mic (it'll show up by name, like "Samson Q2U") or your audio interface (e.g., "Focusrite Scarlett 2i2"). Match that same device for your output. This lets you hear yourself through the headphone jack on your gear, which is the secret to avoiding that distracting, laggy echo.
Dialing in the Perfect Gain
Okay, once your software sees your hardware, the single most important skill to learn is setting your gain. Gain is not volume. It’s the sensitivity of your microphone's input. Imagine it's a faucet controlling how much of your voice flows into the recording.
Crank it too high, and your audio will "clip." This creates a nasty, distorted sound that's completely unfixable in post-production. Set it too low, and when you try to boost it later, you'll also crank up all the background hiss and room noise. The goal is to find that perfect sweet spot right from the start.
This flowchart shows that simple, clean signal path we're aiming for.
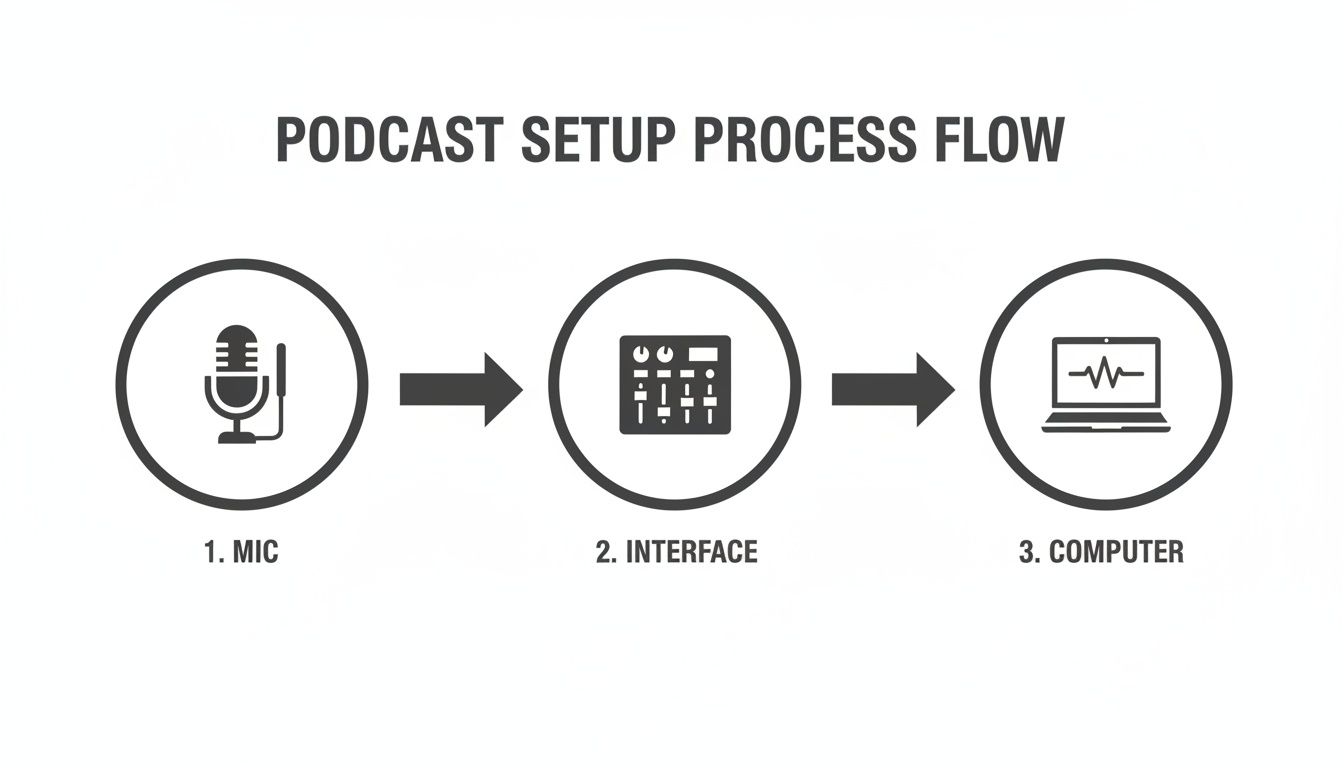
This path—mic to interface to computer—is your foundation. Your main control point for a professional sound is right there at the interface's gain knob.
What a Healthy Waveform Looks Like
Start talking into your mic at a normal, conversational volume and watch the level meter in your DAW. Those bouncing bars of green, yellow, and red are your guide. You want your voice to consistently peak in the yellow zone, landing somewhere between -18dB and -12dB. It’s okay if a loud laugh occasionally nudges into the red, but it should never, ever live there.
Aim for a recording level where your average speech hits the yellow part of the meter. This gives you a strong, clean signal with plenty of headroom to avoid digital clipping, which is the point of no return for distorted audio.
Today, AI-powered software is a huge help, with 57% of podcasters using it to polish their final audio. While a tool like Descript's Studio Sound can perform miracles, it works best with a clean source file. Still, Audacity remains a powerhouse, with 24% of podcasters relying on it for editing. You can find more stats on the tools shaping the industry in this detailed podcasting report.
Getting your levels right before you hit record is non-negotiable. It's a few minutes of testing that will save you hours of headaches later. This is what separates the amateurs from the pros.
Mastering Mic Technique and Your Recording Space
You could drop a grand on the best microphone money can buy, but if you stick it in a big, echoey room, it's going to sound terrible. It’s a hard truth of audio. The great news? You don't need a professional studio to sound like you record in one.
The secret isn’t just about the gear; it's about taming your environment and mastering your mic technique. Your recording space has a massive impact on your final sound. Those hard surfaces—bare walls, wood floors, big windows—are your worst enemies. They bounce sound waves all over the place, creating the reverb and echo that makes audio sound amateurish and distant.
Our goal is simple: absorb those rogue reflections.
Simple Acoustic Treatment on a Budget
Before you go dropping hundreds on fancy acoustic panels, look around your house. You can seriously improve your audio quality with stuff you already own.
Pick the Right Room: A smaller room packed with soft things is perfect. Think spare bedroom with a carpet, bed, and curtains. A walk-in closet stuffed with clothes? That’s basically a free, ready-made vocal booth. It’s a classic for a reason.
Soften the Surfaces: If you’re stuck in a more open space, get creative. Drape some heavy blankets over mic stands or on the walls around where you're recording. Throw a thick rug on the floor. Stuff some pillows in the corners to act as makeshift bass traps.
Build a Desk Fort: You can even build a mini-vocal booth right on your desk. Just prop up a few couch cushions behind and to the sides of your microphone. It creates a small, absorbent space that works wonders.
These low-tech tricks tackle the root of the problem—a bad-sounding room—and are often more effective than just buying more expensive gear.
Perfecting Your Microphone Technique
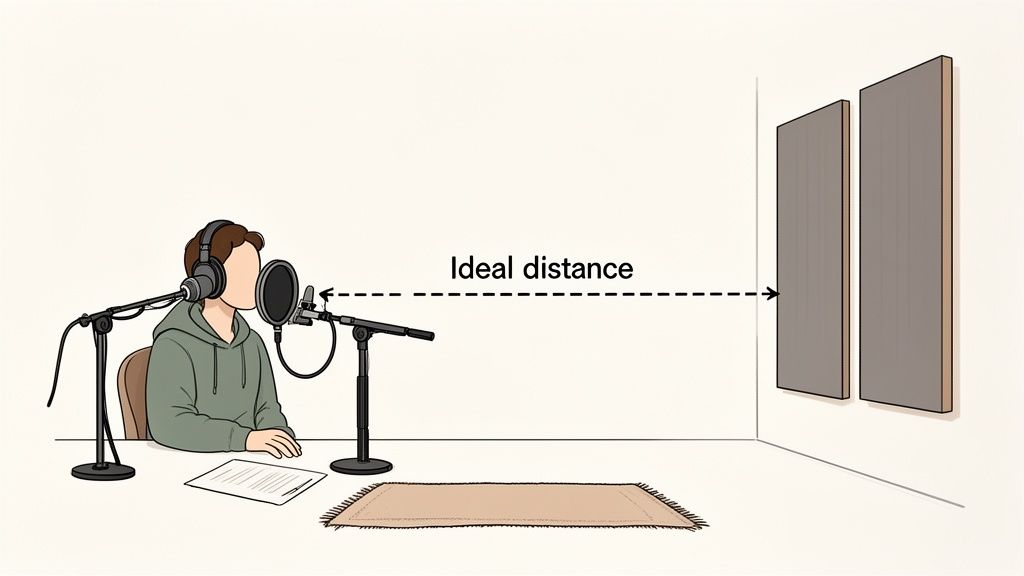
Okay, so you've tamed your room. The final piece of the puzzle is how you actually speak into the mic. Your distance and angle are just as critical as the gain level you dialed in earlier.
For most dynamic mics, a great starting point is to position it four to six inches from your mouth. An easy way to measure this is the "hang loose" or "shaka" sign—it's roughly the distance between your extended thumb and pinky finger. This proximity gives your voice that warm, present, classic podcast sound without being overwhelming.
Pro Tip: Stop talking directly into the front of the microphone. Instead, position it slightly off to the side and angle it about 45 degrees toward your mouth. This one little tweak almost completely eliminates plosives—those harsh "p" and "b" pops—often better than a pop filter can.
From there, just try to keep that distance consistent. If you're leaning in and out while you talk, your volume levels will jump all over the place, which is incredibly distracting for a listener.
When you nail both your space and your technique, you’re finally letting your gear do what it was designed to do: capture your voice at its absolute best.
Expanding Your Setup for Guests and Co-Hosts
Eventually, you’re going to want to bring another voice onto your show. Whether it's a regular co-host or a one-time guest, adding people to the mix makes your content far more dynamic. It does complicate your setup, but the payoff is huge.
The trusty single USB mic that worked perfectly for your solo show just won't cut it anymore. As soon as you put a second person in the room, you need a way to capture each voice on its own, separate track. This is non-negotiable, and it’s where a multi-channel audio interface or mixer becomes your new best friend.
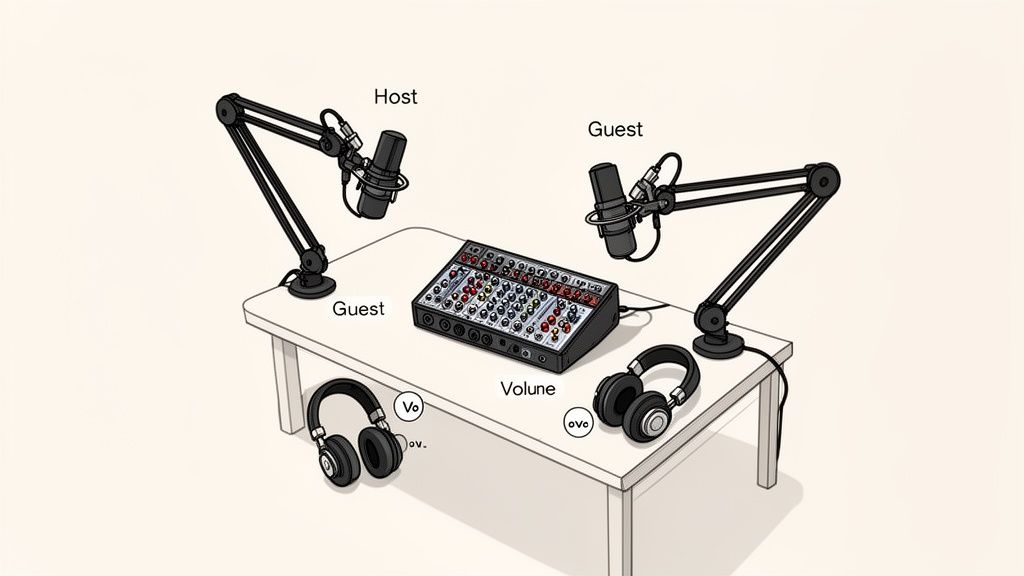
For a two-person, in-person show, you’ll want an interface with at least two XLR inputs. Something like the popular Focusrite Scarlett 2i2 is the perfect starting point. Each person gets their own microphone plugged into a separate channel, giving you total control over their audio later on.
Setting Up for In-Person Guests
Getting the physical gear in place is pretty straightforward. You’re essentially just duplicating your own setup for your guest.
They’ll need:
Their own microphone
An XLR cable
A pair of wired headphones
Both mics will run directly into your multi-channel interface or mixer. Simple.
A critical piece of the puzzle, though, is creating individual headphone mixes. Each person has to be able to hear themselves and everyone else clearly, without any distracting lag. Most modern interfaces have dedicated headphone outputs and controls that make this easy. When everyone is comfortable, the conversation just flows better.
The golden rule for multi-mic recording is isolation. Recording each mic to a separate track in your software is a lifesaver in post-production. It gives you the power to fix one person’s audio—adjusting volume, cutting out a cough, or reducing background noise—without messing up anyone else's.
If you’re in the Jenks area and want to host interviews without buying all the extra gear, finding a local podcast studio rental with professional equipment is a great option. Places like Freeform House have acoustically treated rooms and multi-mic setups ready to go.
Recording High-Quality Remote Interviews
But what if your guest is halfway across the world? You could just record a Zoom call, but the compressed, glitchy audio is a dead giveaway of an amateur show. For professional-sounding remote conversations, you need a tool built for the job.
Platforms like Riverside.fm and Zencastr were designed specifically for podcasters. They solve the biggest headache of internet calls: bad connections.
Instead of recording the choppy audio from the call itself, these services record each person's audio locally on their own computer in full, uncompressed quality. After the call, those pristine audio files are automatically uploaded to the cloud for you to download.
This means that even if the internet stutters and freezes during the live conversation, the final recordings you work with will be perfectly clean and uninterrupted. The result sounds like you were all sitting in the same studio. Best of all, it's incredibly easy for your guest—they just click a link, pick their mic, and start talking. It’s a total game-changer for maintaining high production value.
Common Podcast Setup Questions Answered
Even with the best guide in hand, you’re bound to hit a few snags when setting up your podcast gear for the first time. It happens to everyone. Let’s walk through some of the most common hurdles I see podcasters face, from nagging tech issues to the big question of when to upgrade.
One of the first dilemmas podcasters run into is where to spend their initial budget: on a pricey microphone or on improving the recording space? My answer is always the same: the room. A basic mic like a Samson Q2U recorded in a closet full of clothes will sound infinitely better than a $400 microphone in an empty, echo-filled kitchen. Your environment has the final say on audio quality, period.
Another classic problem is that persistent hum or buzz that just won't go away. This is almost always a "ground loop" issue or simply a bad cable. The first thing to try is plugging your audio interface and computer into the exact same power strip. If the noise is still there, start swapping out your cables—XLR, USB, all of them—one by one until you find the culprit.
Upgrading and Optimizing Your Setup
So, when is it actually time to ditch the trusty USB mic for a full XLR setup? The time to make the jump is when you need more flexibility. If you're planning to have co-hosts in the room with you regularly or you want finer control over your sound with a mixer’s EQ and effects, an XLR mic and an audio interface are the natural next step to level up your production.
It's not just about sounding good for the sake of it; listener expectations are higher than ever. The podcast industry is exploding, projected to hit $6.6 billion by 2025. In such a crowded space, new research shows that 46% of listeners say poor sound quality is a major reason they'll stop listening to a show. You can get more insights on this in a detailed report on 2025 podcast equipment trends.
I also get asked a lot about using Bluetooth headphones for recording. While it seems convenient, please don’t do it. Bluetooth introduces a noticeable delay, or latency, between when you speak and when you hear yourself. It's incredibly disorienting and makes it impossible to record naturally. Always stick with wired headphones plugged directly into your mic or interface for zero-latency monitoring.
Finally, a piece of advice I always give: simplicity beats complexity. Every extra piece of gear you add to your chain is another potential point of failure. It’s far better to master a reliable, minimalist setup than to be constantly troubleshooting an overly complicated one. This mindset frees you up to focus on what actually matters: creating a great show.
For a deeper dive into turning your podcast into a real venture, check out our guide on how to start a podcast business.
Ready to record in a space where all the technical headaches are handled for you? The in-house podcast booth at Freeform House offers a professional, acoustically treated environment with top-tier equipment, letting you focus solely on your content. As Jenks' premier, membership-based club, Freeform House is a dynamic community hub designed for collaboration and connection. Learn more about membership and book your first session today at https://freeform.house.
Comments