How to Record a Video Podcast: A Studio Guide for 2026

The guest is ten minutes out, one camera is still on auto, and the only microphone you can see is the one in the laptop. You already know how this goes. The talk is fine, the echo is not, and the person who listens in the car misses half the point because someone pointed at a screen.
Learning how to record a video podcast is mostly a discipline problem. One recording has to work for people who watch and for people who never look up. A preflight and a recovery plan save more episodes than another lens. Lock the standard before you plug anything in.
Capture Standards to Lock In Before You Record
A usable episode starts with one capture standard, not with a platform export you invent at the end. Ampere Analysis reported that 20% of internet users worldwide watched a video podcast on a social-video platform during the third quarter of 2025, and YouTube led with 11% of internet users in that period. The master has to hold up as a full episode and as short vertical clips.
Netflix's published delivery specifications accept progressive video at 23.976, 24, 25, 29.97, 30, 50, 59.94, and 60 frames per second, and they require delivery at the native frame rate and the original aspect ratio. I would lock progressive 4K or 1080p at 23.976 or 24 fps for film-style motion, or 29.97 or 30 fps for a conventional talk look. Every camera uses that one rate.
Capture settings by output
Setting | Recommended value | Why it matters |
|---|---|---|
Resolution | Progressive 4K or 1080p | Keeps detail for crops and clips |
Frame rate, cinematic | 23.976 or 24 fps | Film-style motion across all cameras |
Frame rate, broadcast | 29.97 or 30 fps | Conventional look for talk-style shows |
Audio sample rate and depth | 48 kHz, 24-bit | Video production standard for sync |
Audio loudness | About -16 LUFS integrated | Consistent playback across platforms |
Vertical excerpt | 1080x1920 (9:16) | Mobile clips cut from the widescreen master |
Mixing frame rates is the mistake that costs the edit. Motion turns uneven, sync gets messy, and conversion artifacts show up where a cut should be invisible. The second mistake is squeezing a widescreen master into a 4:3 frame. Reframe 9:16 excerpts from the master. Don't replace the master with them.
Isolated tracks matter as much as the picture. You can fix one guest's level, or pull noise off one mic, without damaging the whole conversation.
Write the frame rate and the sample rate into a session template today. Next time, the recording starts from those settings instead of whatever the last export left behind.
How to Set Up the Room, Light and Camera
The room can spoil a recording before the camera is switched on. Hard surfaces reflect sound, while poor chair and light placement make a speaker harder to see clearly. Set the room for both the conversation and the frame.
A home setup often needs furniture and controlled light more than a new camera.
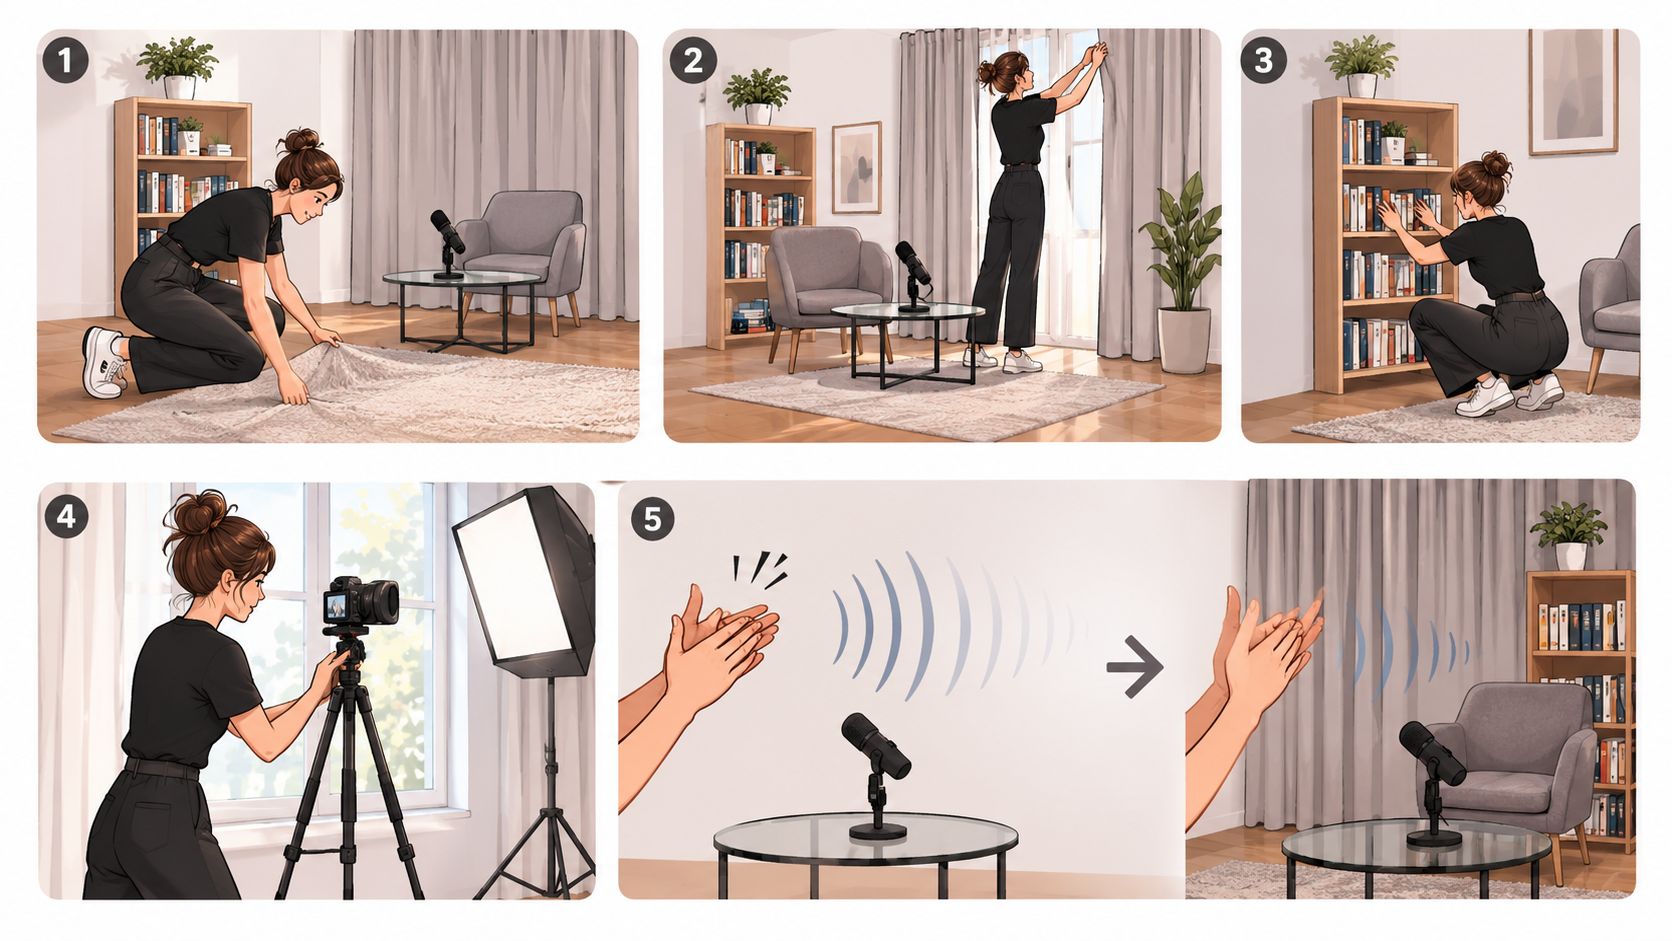
Soften the room first. Rugs, curtains, and bookshelves reduce reflections; bare walls and glass tables send sound back toward the microphones. Clap once and listen. If the room rings, add soft furnishings before setting up the camera.
Angle the chairs. Turn the seats slightly toward each other and leave space between the speakers and the back wall. A podcast studio layout can help you plan the arrangement without crowding the background with equipment.
Compose with the rule of thirds. Place the speaker toward the left or right third of the frame, with the eyes near the upper third. This leaves space for a name graphic without covering the face.
Light from the side. Use a window as the key light and add soft artificial fill if the face falls into shadow. Room light alone can leave a small-sensor camera looking flat.
Set the camera at eye level. Use a tripod and frame the speaker from the head to the shoulders. A wide phone lens placed close to the face can distort it.
Keep the microphone close. Position each mic about 15 to 20 cm from the mouth, slightly off-axis to reduce plosive bursts.
If the face looks flat or the bookshelf is sharper than the guest, adjust the chair, light, or background. Raising ISO will brighten the image, but it will not fix poor placement.
Record a ten-second test and review it on the camera. Check that faces are clear and the background does not compete for attention before the conversation begins.
Microphones and Cameras Matched to Your Setup
Dialogue quality beats resolution. A dedicated microphone close to each speaker will outperform a sharper camera fed by a laptop mic. Four thousand pixels don't repair a thin, distant voice.
Dynamic close-talk mics handle untreated rooms and loud keyboards better because they reject more of the space. Condensers pick up more detail, and they also pick up the reflections you just tried to kill. Lavalier clips suit a walking shot, but cloth rustle will ruin them if the capsule sits on a seam.
A phone on a stable mount is enough for a solo test. A mirrorless body with a clean output suits a two-camera interview. Whatever you choose, both cameras share one frame rate and one resolution. You also need one interface input per microphone, with manual gain, so each person lands on an isolated track.
Gear tiers by setup
Setup tier | Microphones | Cameras | Best for |
|---|---|---|---|
Solo or two-person, lean budget | Dynamic close-talk mic per speaker | One smartphone or mirrorless camera on a tripod | Quiet rooms and first episodes |
Two or three guests, controlled room | Dynamic mics per speaker on separate interface inputs | Two cameras, main and wide, matched frame rate | Most small studios |
Premium booth, multi-camera | Dedicated mics with soundproofed room | Two or more matched cameras with synced timecode | Teams and recurring shows |
For a small room and two guests, I would start with the middle row. Matched cameras and one mic each will outlast a single expensive body with a shared mix. A booth-style show with recurring episodes belongs on the third row, where timecode and a treated room stop you from rebuilding the setup every week. The professional podcast equipment list is only useful after you've picked the row. Buying the premium tier for a first episode mostly adds failure points.
How to Route Audio and Record Every Track
The signal path is a sequence. Skip a step and you usually find out in the edit, when nobody can slip the voices apart.
This path assumes the session template already holds your frame rate and sample rate.
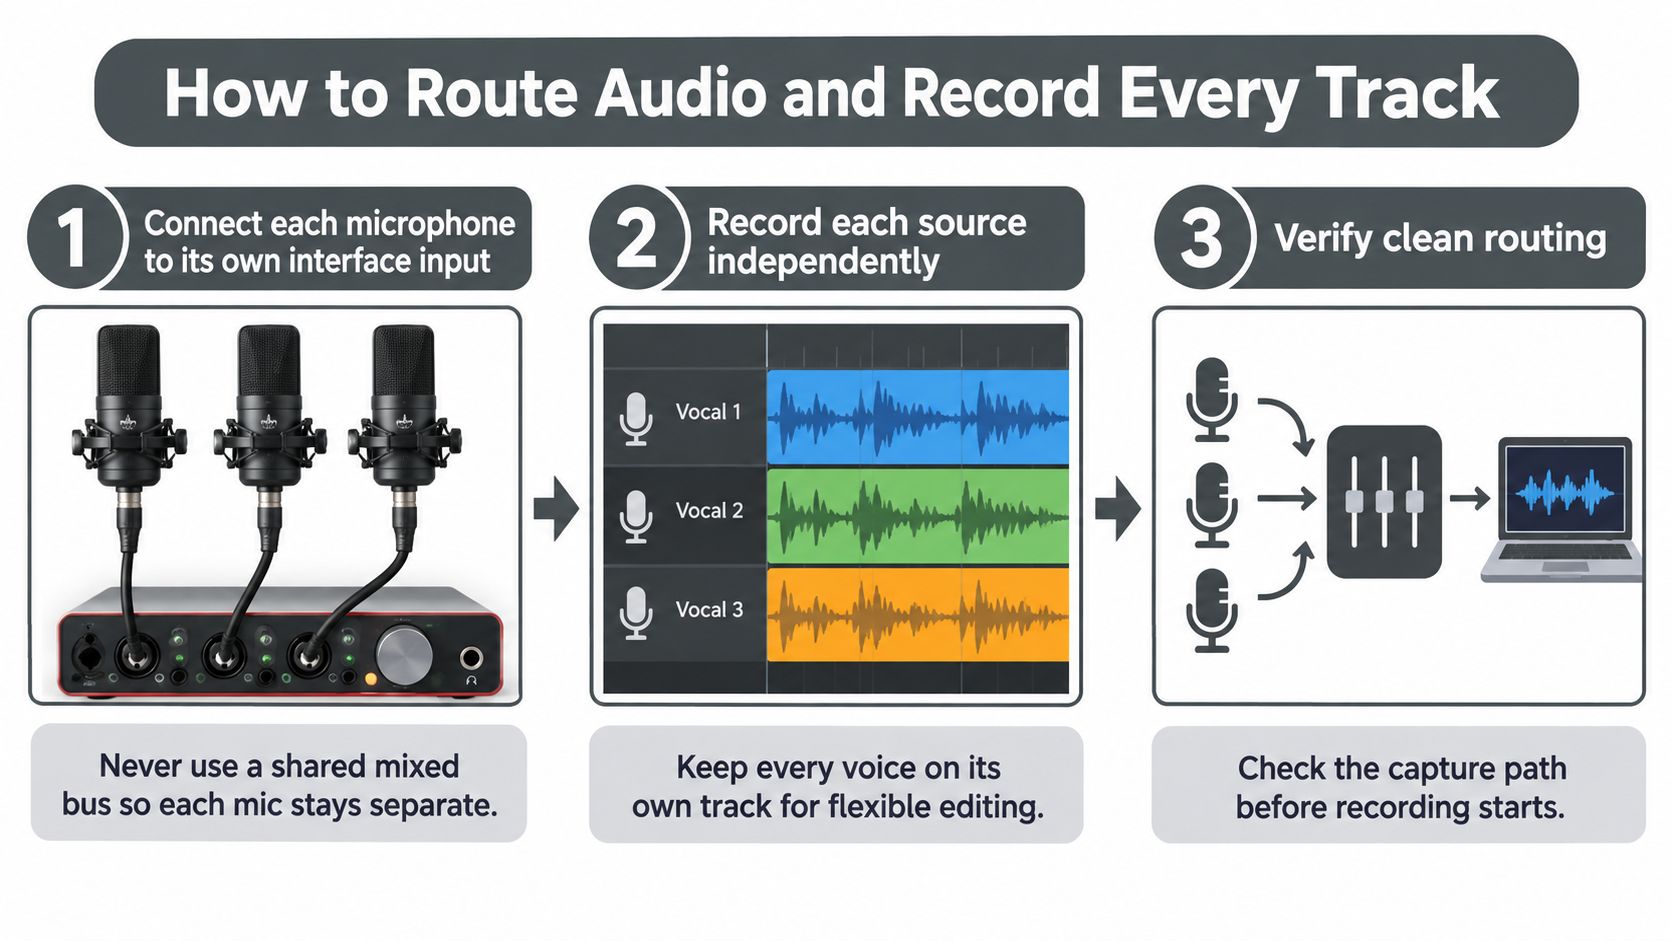
Give each mic its own input. Don't land guests on a shared mix bus. A summed recording can't be unmixed when one person is loud.
Set gain by hand. Peaks should sit around -12 to -6 dBFS. Clipping is gone for good. Auto gain will ride up during a pause and bring the room with it.
Arm one track per speaker. In any multitrack app, add a reference track from the camera microphone and use it only for sync. Don't publish that track.
Start each camera on its own card. Use the frame rate already in the template. Lock exposure and focus before the guest sits, or the face will hunt every time they lean in.
Grab room tone. Record five to ten seconds with everyone silent. Noise removal needs a clean sample of the room, not a guess taken from under a word.
Sync with a clap. A dual-system workflow lines isolated mics up to camera video with a clap, waveform matching, or timecode. Past about an hour, use shared timecode. Independent clocks drift, and lip-sync error stacks up.
Run a backup. A second recorder, or a parallel copy, means a dead laptop doesn't end the episode.
Where episodes actually die
The failures that show up most often are a compressed call recorded as the master, camera microphones used as the show audio, and no room tone at all. Mixed frame rates belong on that list too. Any one of them makes a dialogue edit obvious.
Preflight Checks and Monitoring During the Shoot
A cable can look secure while its connector crackles under movement. Before the guest arrives, record and replay about two minutes on headphones. Check the sound as well as the meters, then confirm the picture and audio stay in sync. A preflight catches faults while there is still time to fix them.
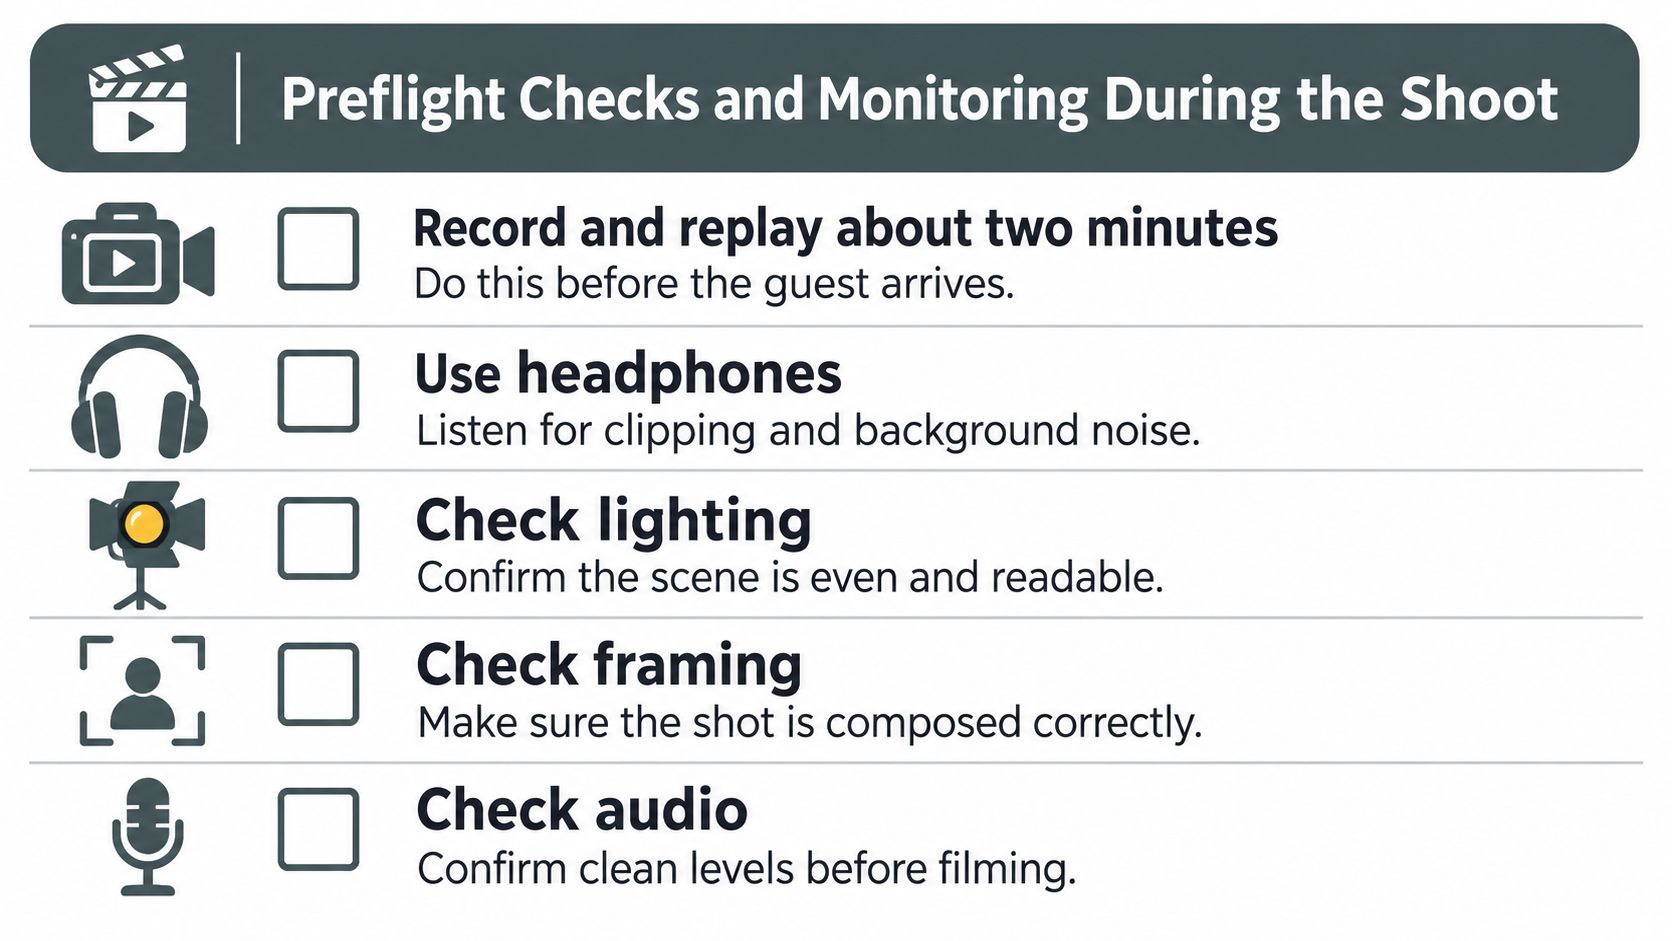
What has to pass
Clipping: Keep peaks below full scale. A flat-topped waveform cannot be repaired.
Noise floor: Aim for background noise below roughly -60 dBFS. If the room rises above that, pauses will expose the noise between speakers.
Level match: Keep speakers within a few decibels of one another. A much louder mic makes the quieter speaker sound distant when listeners switch between voices.
Sibilance: Listen for harsh “s” and “t” sounds. Adjust the mic off-axis if they bite; do not rely on a de-esser to fix poor placement.
Picture: Replay the test and check lighting, framing, focus, and lip-sync. A camera's live view will not reveal every problem in the recorded file.
Loudness later: Common platform playback targets are around -14 to -16 LUFS integrated. That is an editing target, not a set check. Consistent dialogue levels make it easier to reach.
Once the take passes, keep the local originals. Export an MP4 with H.264 video and AAC audio at 1920×1080, using the capture frame rate. Cut 1080×1920 excerpts separately.
When something fails mid-session
Keep a continuous local backup on each device. If a remote guest's connection drops, preserve the local recording and reconnect rather than replacing the master with call audio. Keep a spare battery and card for each camera, and get the consent and release signed before recording.
If any check fails, stop and fix it before the guest sits down. During the session, monitor for changes and use the same routine: pause, identify the fault, correct it, then record a short test and replay it before resuming.
Editing for Both Watchers and Audio-First Listeners
Edit for two audiences, or the watchers get a show and the listeners get a puzzle. Talkers reported that 78% of weekly podcast consumers watched podcasts with video in Q1 2026, while 80% also listened to audio-only podcasts. Only 8% said they exclusively watch video, and 92% listen at least sometimes.
Start the cut with the screen off.
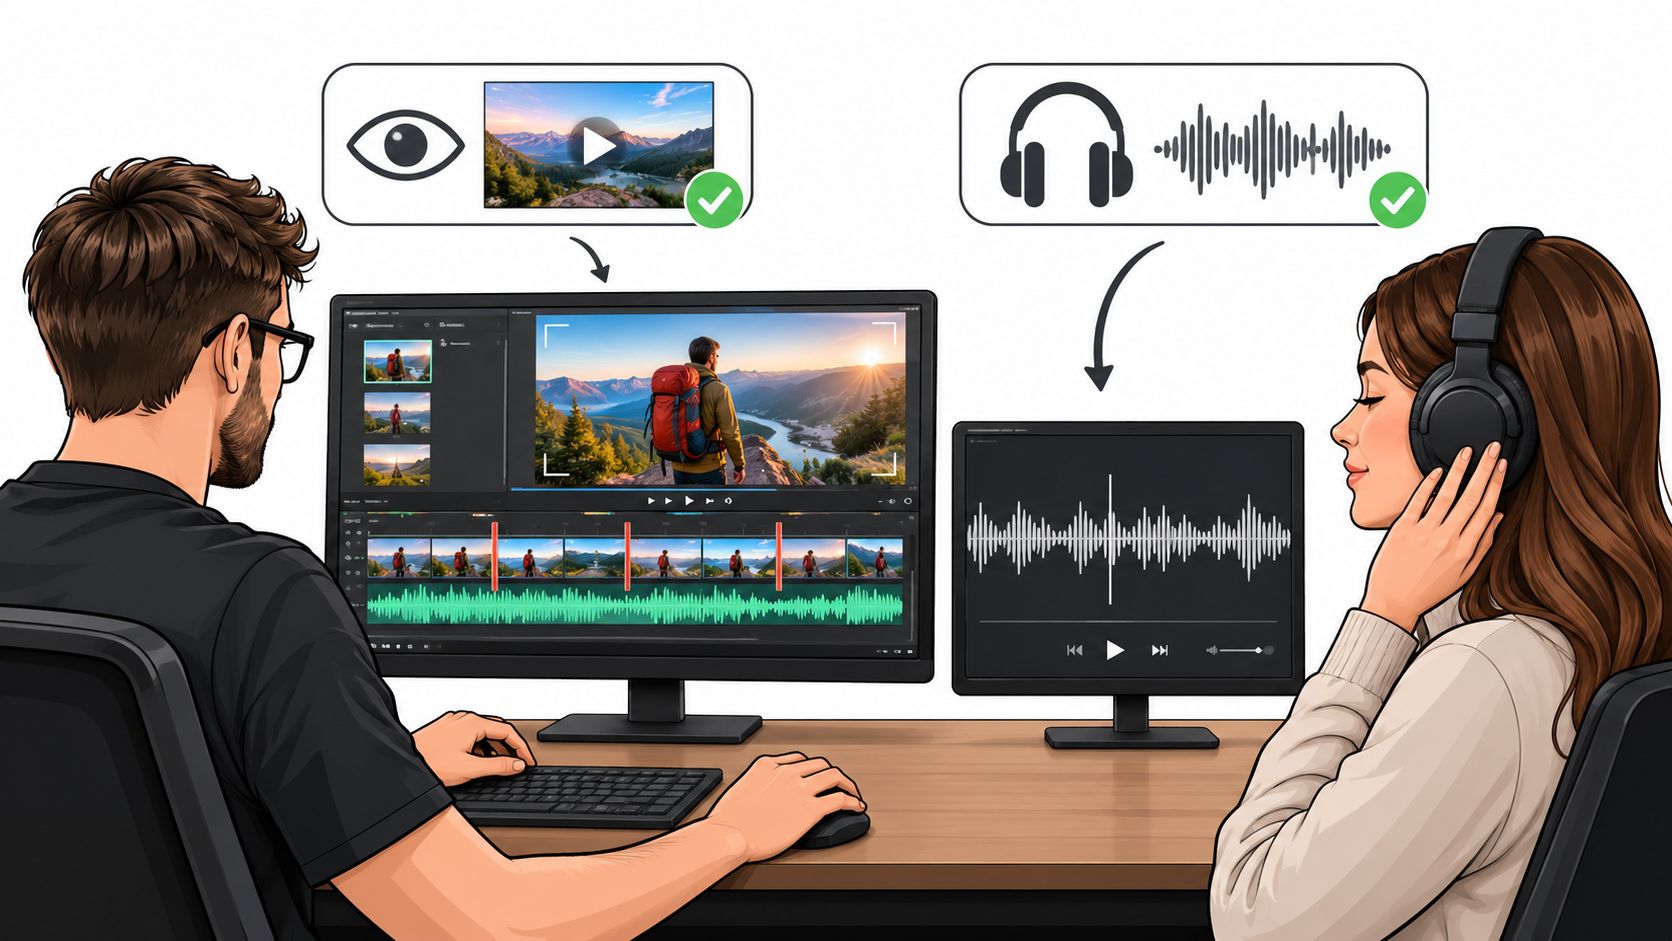
Listen with the screen off
Play the rough cut on headphones and mark every moment that only makes sense if you can see it. UK figures in that same report found that 68% of weekly podcast listeners consume podcasts that include video, and some of those viewers treat the picture as background. A chart, a product, or a raised eyebrow has to be said out loud.
Build the podcast production process around that test.
Verbalize the visual. Name the chart, the object, or the reaction. "You should see her face" is useless in a car.
Cut audio-safe. Removing a pause shouldn't leave a pitch jump or a swallowed word. If the video cut looks smooth and the voice jumps, the audio edit failed.
Add picture that carries information. Camera changes, B-roll, and lower-thirds should add a name or a detail, not a graphic the listener can't follow.
Review captions by hand. Check names, business names, technical terms, and speaker labels. Automatic captions will miss the one word the guest came to say.
A practical pass sounds like this. Say a founder holds up a prototype. On video, the shot is obvious. On audio, you need the sentence, "This is the aluminum housing, about the size of a deck of cards." The lower-third can show the company name. The voice still has to say it.
Export three things: the full video master, a separate audio file near the loudness target you set at capture, and vertical excerpts for mobile. The episode passes if a commuter can follow it with the screen off.
A short walkthrough of that screen-off pass is worth watching once, then doing on your own timeline.
Test the Workflow in a Real Booth
Before buying more gear, run the full recording workflow in a booth. Record a short test, then listen back on headphones. Check that the picture and sound match, and confirm the session template has the intended frame rate, sample rate, and export settings. Note any changes needed to voice, chair, or camera placement so the next session starts from a reliable baseline.
Freeform House is a membership club and workspace in downtown Jenks. Its podcast booth has professional-grade microphones, soundproofing, and editing software. Members can also use in-house facilities at First North for podcast and photography rentals.
Bring a one-page session template with recording settings, a signed guest consent and release completed before recording, and a caption list of names, business names, and technical terms to review by hand.
Book a booth session and run the test before the guest arrives. Listen for room noise and check that the recording plays back correctly. A booth provides a controlled place to work, but the preflight catches setup problems while there is still time to fix them.
Freeform House offers a podcast booth in its downtown Jenks workspace. Bring your template, run the preflight, and check that the episode works with the screen off. Visit Freeform House to book a session.
Comments