Photography Lighting Setup That Looks Real

You've got a portrait booked in a room that wasn't designed as a studio, a product table waiting in the next space, and ten minutes before the next member arrives. The camera isn't usually the problem in that situation. The photography lighting setup is. A light that's too close can make the nearest face bright and the farthest one dull. A modifier that's too small can turn a flattering portrait into a collection of hard, distracting shadows.
Freeform House is envisioned as a premier, membership-based club in the heart of Jenks, Oklahoma's 10 District downtown. Comparable to the renowned SoHo House, it offers more than just a social club. Members can use co-working spaces and a dynamic community hub built for collaboration and connection, a central gathering spot aimed at fostering a creative and cooperative spirit within the local community. That mix of rooms matters because realistic photography depends as much on the space as on the light.
What Great Lighting Actually Feels Like
In the rise loft studio at Freeform House, one member may be clipping a softbox to a C-stand while another shoot clears the corner. A portrait in that room needs a repeatable choice: a source aimed for the face, a modifier large enough to soften its edges, and a simple way to keep the shadow side from closing down. A starter setup can stay compact, with one light, one stand, a medium softbox, and a white card. Spend on modifier size before adding a second light.
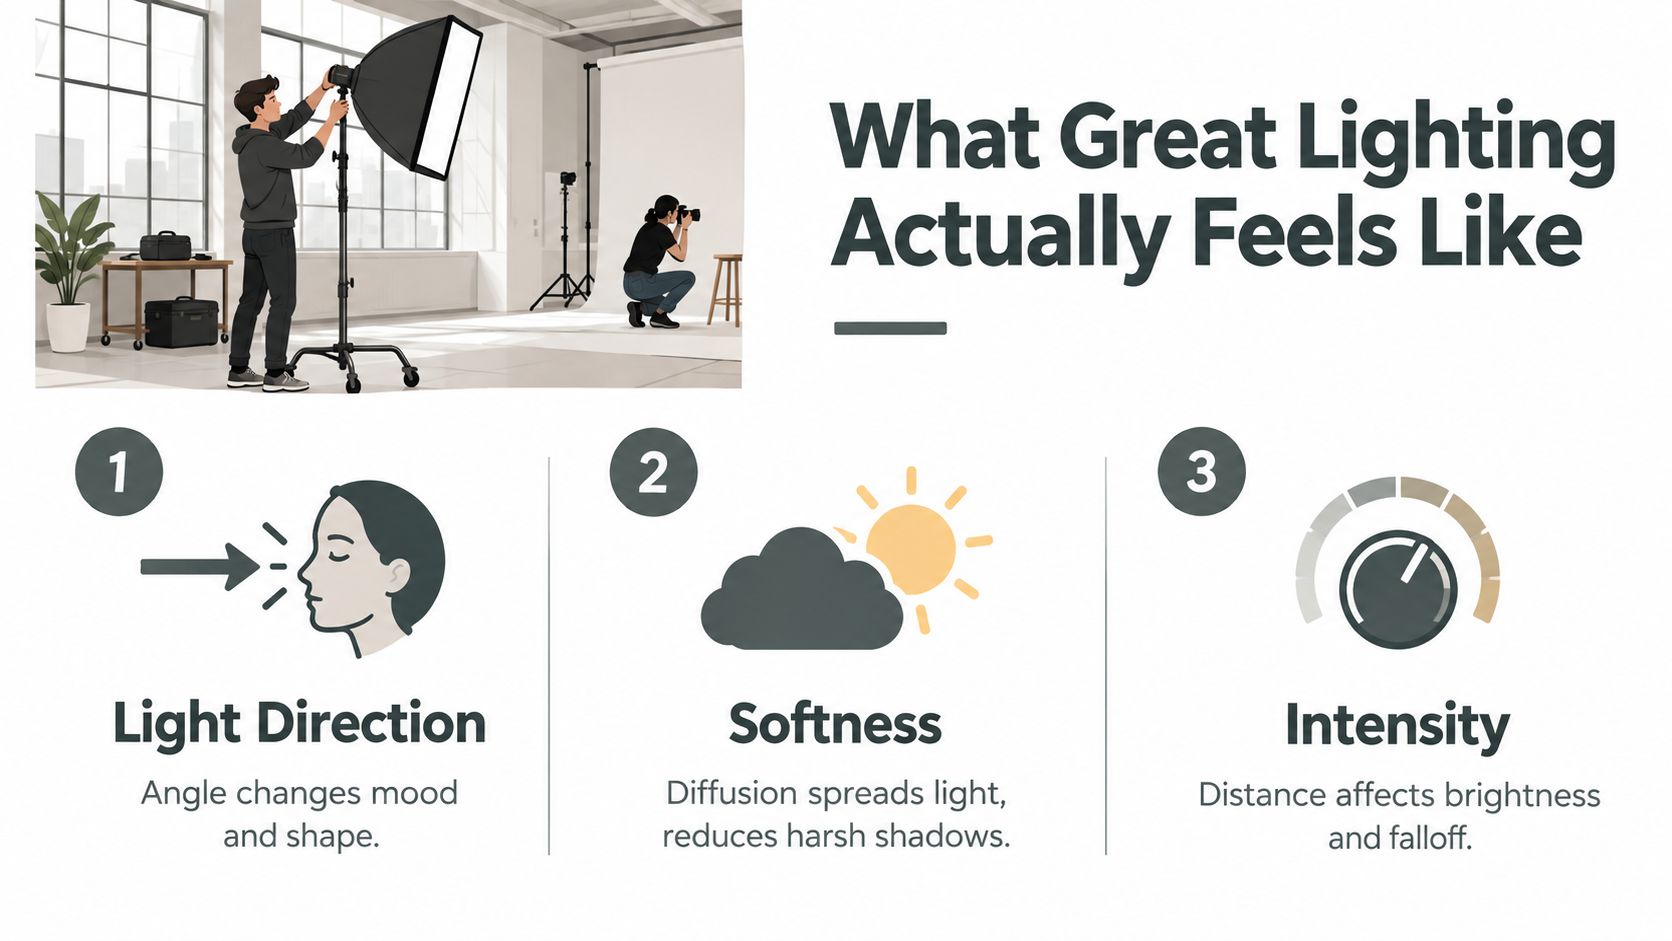
Three decisions shape every photography lighting setup:
Distance: Source-to-subject distance sets brightness and controls how quickly light falls across the scene.
Modifier size: The modifier's apparent size from the subject determines whether shadows look soft and gradual or crisp and defined.
Fill method: A white bounce card keeps the kit simple, while a second light provides separate control over shadow density.
The three choices work together. Moving a subject from 3 m to 6 m from a point light reduces illumination to one-quarter, requiring about 2 stops more exposure, according to this inverse-square lighting reference. A smaller modifier also appears smaller from the subject's position, so shadow edges become harder.
Start with the source, not the accessories
Set the key light where the face looks right before adding flags, gels, or a rim light. In a small club room, place it slightly off-axis, check the catchlight, and watch the nose and jaw shadows. Adjust distance for exposure and contrast. In a tighter room, moving the source closer may give softer light without demanding more output. Pulling it back covers a broader arrangement, but needs more power and can reduce sculpted contrast.
Practical rule: One large modifier and a white card will teach you more about direction and falloff than a crowded stand layout.
Artificial-light photography developed from L. Ibbetson's 1839 oxy-hydrogen limelight experiments to the first electric-light studio in 1877, then through flash powder, the 1929 Vacublitz flashbulb, xenon proposals in 1936, and Harold Edgerton's studio electronic flash design in 1939, as documented by The Camera Museum's artificial-light history. Modern key, fill, and backlight methods reflect those gains in control and portability.
The One-Light Portrait That Does Most of the Work
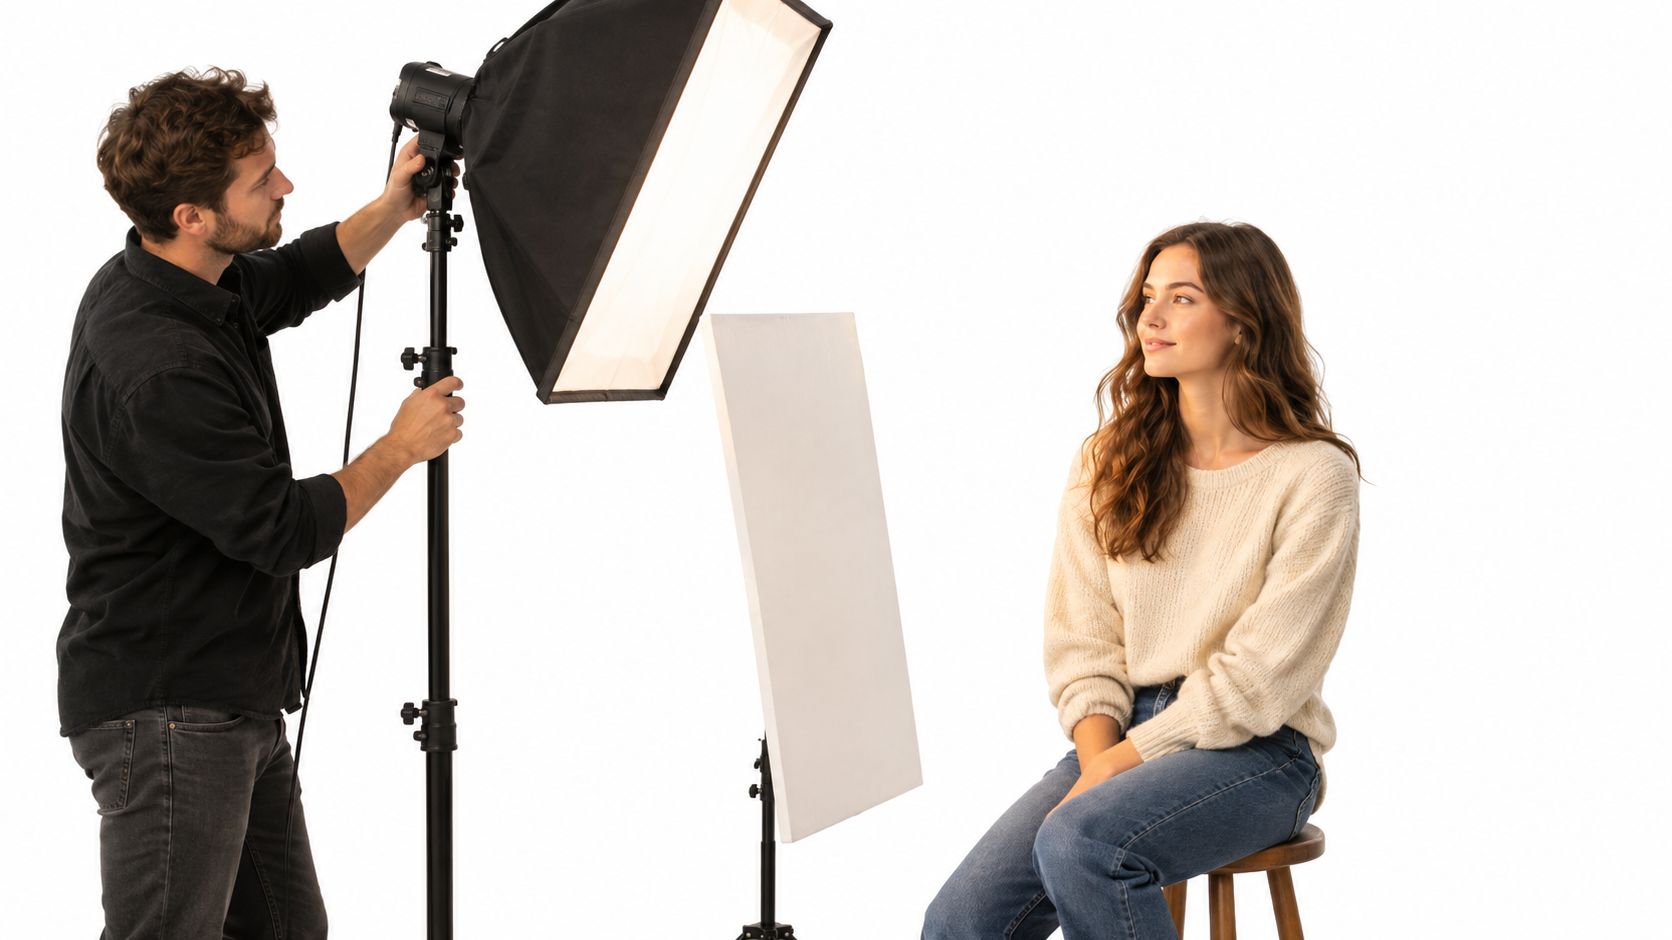
Start with a 36-inch softbox placed roughly 45 degrees camera-left, at eye height or slightly above, and about 4 to 5 feet from the subject. Aim it slightly past the face rather than directly at the nose. That feathered edge gives you useful direction without making the near cheek excessively bright.
Place a white foamcore card on the opposite side. It won't erase the shadow, and that's the point. The card lifts the dark side while keeping enough shape to show cheekbones, jawline, and skin texture.
Why the distance works
If you move the softbox from 4 feet to 8 feet, you double the distance and lose about 2 stops of illumination, following the inverse-square relationship described in this portrait lighting guide. That falloff can sculpt a solo portrait, but it also means the shaded side responds quickly to small placement changes.
Keep the box close when you want soft transitions and stronger separation from the background. Pull it back when you need more even exposure across a broader arrangement. Don't move it farther away just because the light feels intense. Reduce output first if the room and subject already have the contrast you want.
Add a second source only for a reason
For a two-light version, keep the softbox as the key and put a hair light or rim light behind the subject. Set it about 1 stop below the key, a commonly recommended relationship in this softbox and umbrella comparison, so the edge separates the subject without becoming the first thing viewers notice.
A practical starting point is 1/200 second, ISO 100 to 400, and f/2.8 to f/4. Those settings are working starting points rather than guarantees. For color, target about 5200K for strobes or 5600K for continuous LEDs, then confirm the result with a gray card if the room contains mixed light.
Matching Setups to Each Freeform House Room
Pick the room before packing the light. A cream wall and a dark wall don't return the same amount of spill, and a low ceiling can turn a deliberate side light into an accidental overhead fill.
The Gallery Lounge, with cream walls and a 9-foot ceiling, is suited to natural-light augmentation. Put a 48-inch shoot-through umbrella near the window, angle it toward the subject, and place a bounce card opposite. The pale surfaces will return some fill, so watch for shadows becoming too weak.
The Music Room needs tighter control. Darker paint absorbs spill, so place a key softbox at 45 degrees and use a flagged rim behind the subject. The flag keeps the rim from washing across the background and helps the room retain its depth.
The rooftop deck is a daylight problem rather than a darkness problem. Use a battery-powered strobe with a shoot-through umbrella, keep the modifier close, and be prepared to raise ISO when daylight overpowers the source. The rise loft studio is the gear-heavy choice, with room for a strip light, overhead boom, and V-flat for products or group portraits.
For a broader overview of the available studio environment, see Freeform House's photography studio space guide.
Room | Wall/Ceiling | Recommended Setup | Distance & Modifier |
|---|---|---|---|
Gallery Lounge | Cream walls, 9-foot ceiling | Window augmentation with bounce | Keep the 48-inch umbrella near the window, card opposite |
Music Room | Darker paint | Key softbox and flagged rim | Keep the key close enough for shape, flag the rear source |
Rooftop deck | Open daylight | Battery strobe and umbrella | Keep the umbrella close, adjust ISO as daylight dominates |
Rise loft studio | Studio-oriented working space | Strip light, overhead boom, V-flat | Use larger modifiers and leave room for group or product arrangements |
Let the room supply part of the look
Cream walls can help a portrait feel open, but they can also flatten the face. Dark walls preserve mood, yet they may swallow a weak rim. The setup works when you treat the room as part of the lighting design instead of trying to overpower it with more fixtures.
Product Tables and Event Coverage
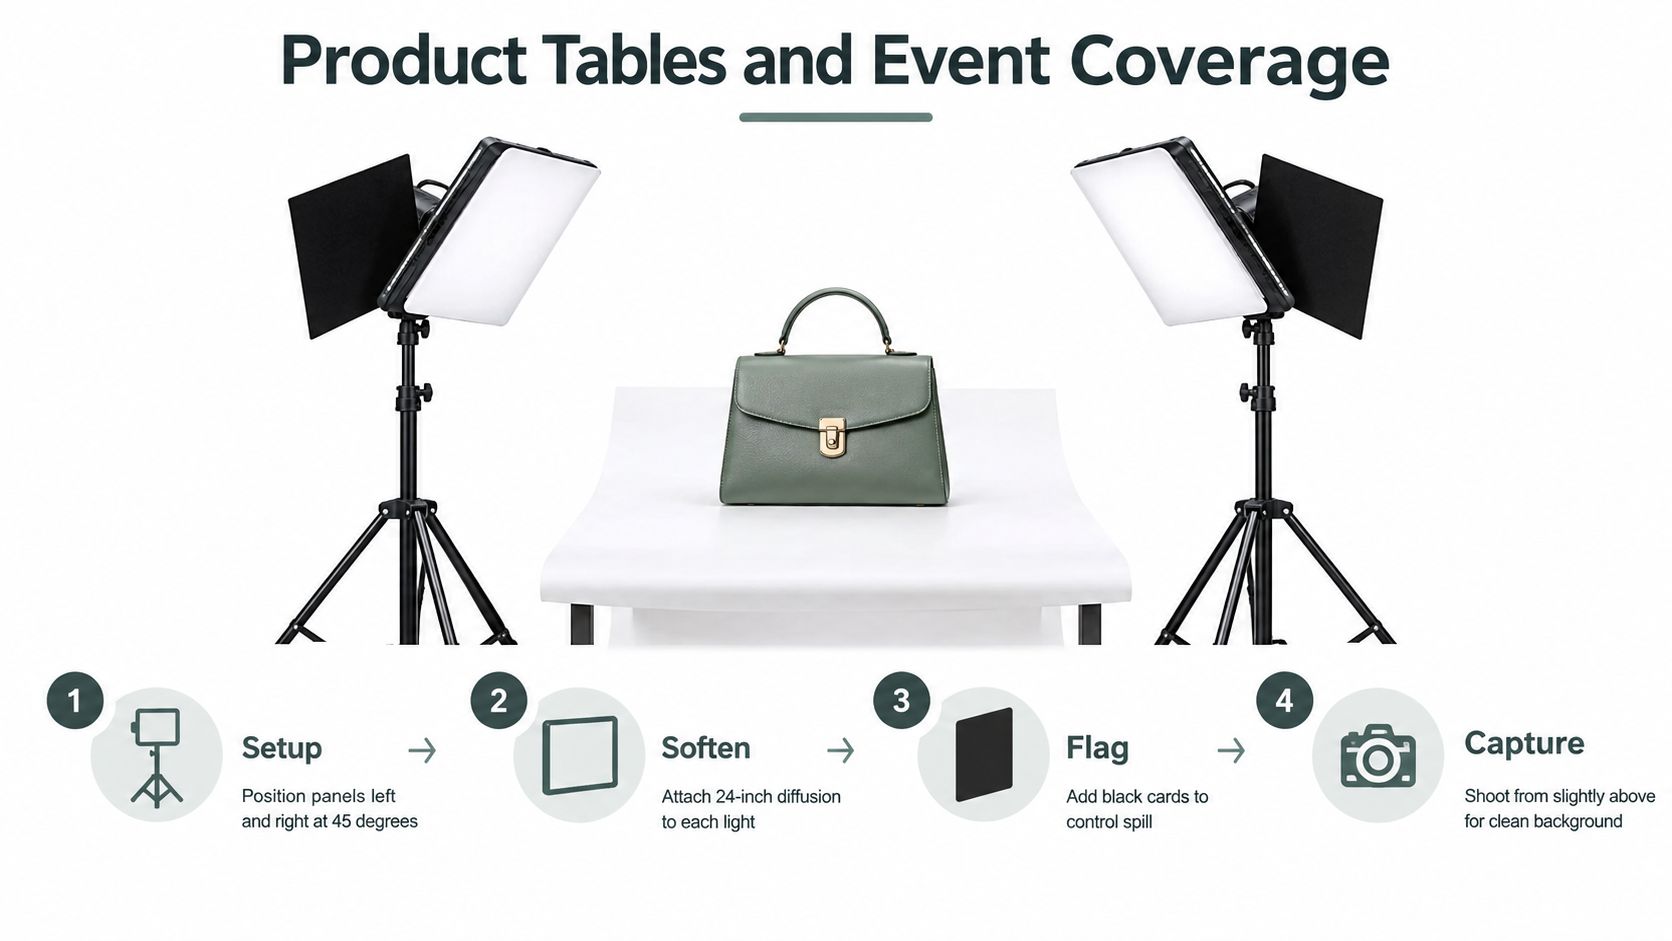
Product photography rewards controlled reflections more than a large equipment count. On a table in the Gallery Lounge or rise loft studio, place the product on a white sweep and use two continuous LED panels at 45 degrees on either side. Put a 24-inch diffusion panel in front of each LED, then position black cards just outside the frame to keep spill from bleaching labels and edges.
The white sweep gives bottles, ceramics, and cosmetics a clean base. The diffusion panels enlarge the apparent sources, while the black cards restore shape where a white environment would otherwise reflect too broadly.
Build the table from one key side
Treat one LED as the key and the other as controlled support. Keep a small white card opposite the key panel to fill the shadow side of a bottle or ceramic object without automatically adding a third light.
Start around f/8 at 1/60 for a product table. Check sharpness across the object, then adjust the light output rather than changing the whole arrangement. If the label looks flat, move the black cards inward. If the shadow edge is too abrupt, enlarge or move the diffusion surface closer to the product.
A softbox remains useful when you need more directional control. Independent guidance describes larger sources as softer because they appear larger relative to the subject, while a softbox can produce a quality similar to softer window light, as explained in this B&H softbox introduction.
Cover cocktails without turning guests into silhouettes
For event coverage in the Gallery Lounge or Music Room, use a single on-camera flash with a bounce card angled toward the ceiling. Keep the card working as a forward-facing lift, not as a bare flash pointed at faces. Place a rim light behind the bar to separate guests from a dark wall, especially in the Music Room.
A useful starting point is f/4 at 1/125 and ISO 800. Watch the background before changing the flash. If the room disappears, expose for more ambient light. If faces are too bright, lower flash output or turn the bounce angle away from the subject.
Why fewer lights often look more real
One well-placed softbox often beats three lights for a member portrait because shadow control matters more than fixture count. A larger modifier creates softer wrap, and a close source gives you a predictable change in falloff as you adjust the subject's position.
I've replaced crowded three-light beauty arrangements with a single 48-inch octa at 4 feet and a white card for fill. The result is easier to tune, skin texture stays cleaner, and the shadows remain readable instead of being canceled by overlapping sources.
The extra lights aren't free in workflow terms. Each one needs a stand, a flag, a trigger channel, and a place where it won't enter the frame or catch a guest's shoulder. If a setup needs more than two lights, question the modifier size and room choice before buying another fixture.
Working preference: Add a second source because the image needs separation or background control, not because the first source feels too difficult to place.
The historical spread of flash supports why portable control became expected. In 1958, Britain used about 10,000,000 flash bulbs, while the United States used about 800,000,000, according to this flash history record. Today's compact strobes and LEDs serve the same practical need, but with far more control over output and color.
Reading Falloff So Faces Stay Even
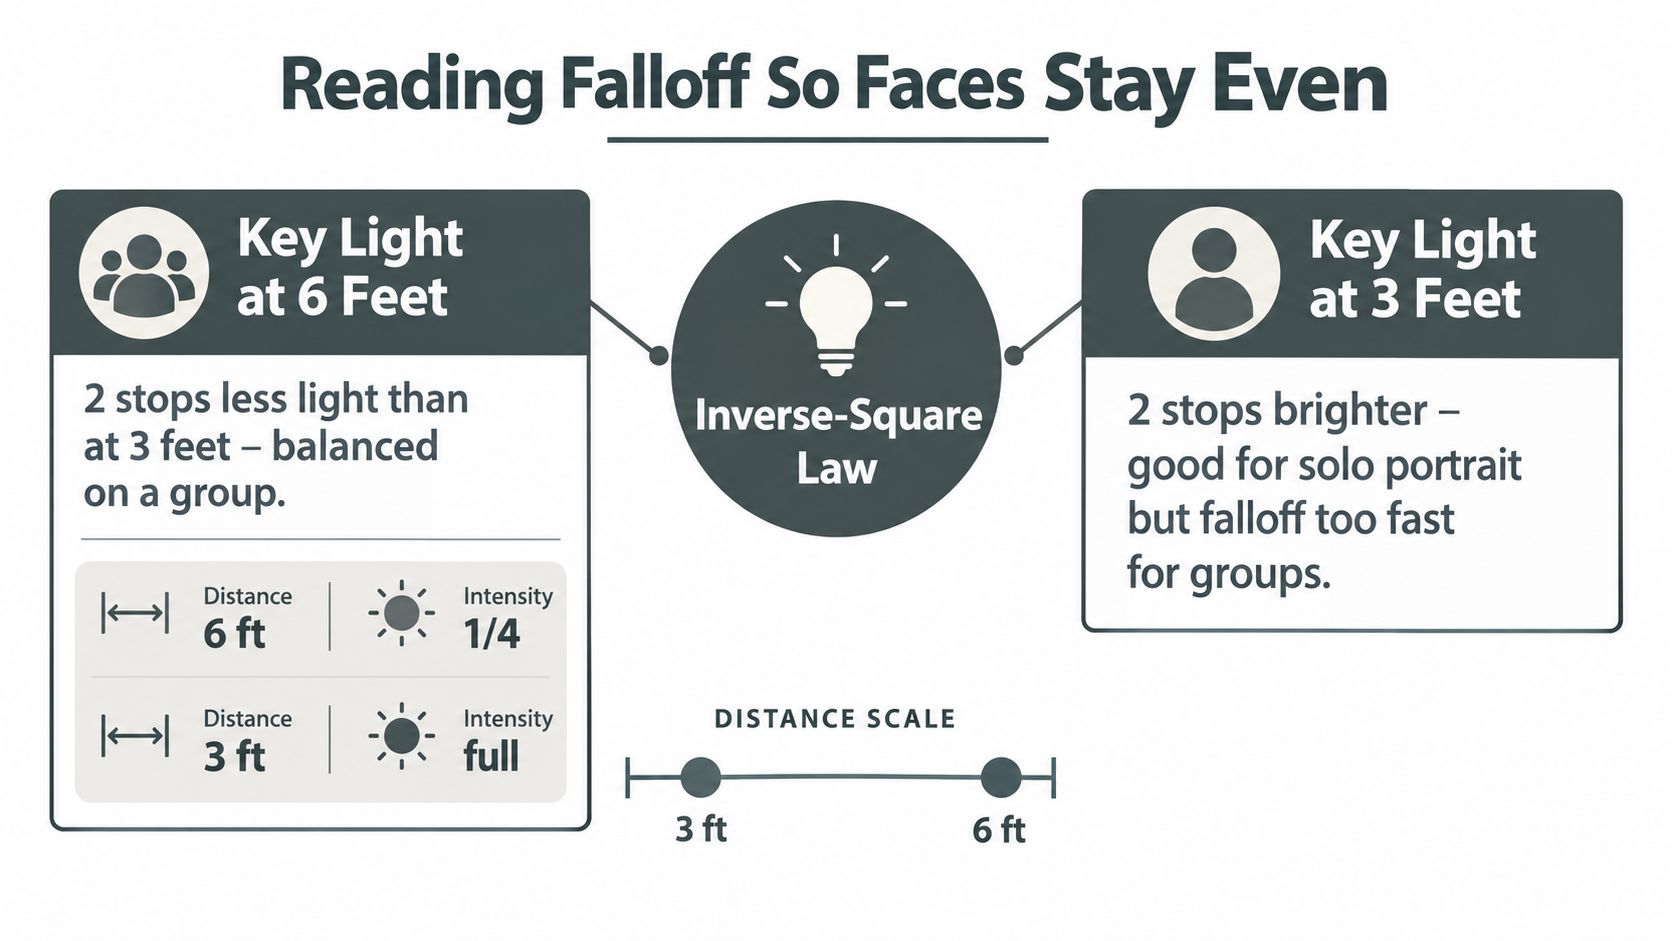
Place a light at 3 feet, then move it to 6 feet, and the brightness change is substantial. Doubling the distance reduces illumination to one-quarter, or about 2 stops, as explained in this inverse-square law reference.
That steep change can shape a solo portrait well. The side of the face nearest the source stays brighter, while the far side settles into controlled shadow. A group exposes the problem quickly. The person closest to the light may be overexposed while someone farther back loses detail.
Pull back before you add power
For a group portrait, move the source away from the front row, then raise output to restore exposure. The greater distance narrows the relative difference between the nearest and farthest faces. Arrange people in a shallow semicircle instead of a deep line, keeping each face near the same lighting distance.
A larger modifier helps when the source cannot come close enough to stay flattering. A large umbrella or softbox covers more faces, but it also increases spill, so check the wall and background brightness from camera position.
Problem | First adjustment | Why it helps |
|---|---|---|
Front row is bright, back row is muddy | Pull the key back and raise output | Reduces relative falloff across the group |
Shadows are hard | Increase apparent source size | Enlarges the source from the subject's viewpoint |
Background is too bright | Feather the source or add a flag | Keeps direct spill off the wall |
Rim disappears in a dark room | Move it closer or raise output carefully | Gives the edge light enough reach |
Ceiling creates unwanted fill | Change angle or block bounce | Restores intentional shadow direction |
Room surfaces change the result. A white ceiling can bounce light into the shadow side and flatten a shaped portrait. Dark walls can absorb a rim before it reaches the subject. Tight rooms also force awkward angles, so inspect the background and shadow pattern from the camera position, not only from behind the stand.
Use Freeform House's photography editing techniques guide after the lighting check, but do not use editing to disguise a preventable exposure difference.
A Fast Setup Workflow You Can Repeat
The fastest shoots start before you enter the room. Pack stands, modifiers, triggers, gaffer tape, gels, and a small white card into one tote. Label the pockets, and test every strobe on the workbench so the first frame at Freeform House isn't a diagnostic test.
Stage the kit in four groups
Support: C-stands, regular light stands, clamps, and sandbags.
Shape: Softbox, umbrella, diffusion, flags, and V-flat.
Control: Triggers, spare batteries, gels, and extension options.
Reference: Gray card, white card, tape, and a printed settings card.
Use a room-specific starting point rather than rebuilding from memory. In the Gallery Lounge, begin with a window-side umbrella and check white balance against the available daylight. In the Music Room, set the key and flagged rim first. On the rooftop deck, confirm battery levels and watch the sky-facing background. In the rise loft studio, establish the key before bringing in the boom or strip light.
Keep the reset shorter than the setup
A clean reset protects the next member's time. Power down strobes and LEDs, cap the stands, remove modifiers, fold diffusion, return flags, and confirm trigger channels before packing the tote.
Use this four-line card inside the case lid:
Gear: Support, shape, control, reference.
Settings: White balance, ISO ceiling, shutter sync, aperture.
Distance: Start close, then pull back when the scene needs evenness.
Reset: Power down, cap, swap, return, test.
For a deeper equipment and room-preparation checklist, use Freeform House's professional studio setup guide. The value isn't in memorizing one perfect arrangement. It's in arriving with a known baseline that leaves you time to direct the subject.
Build the Habit and Your Setup Gets Easier
Three habits survive nearly every room.
First, place one large modifier and let it establish the exposure. Don't add a fill light while the key is still too close, too high, or aimed directly at the face. A white card may be all the support the portrait needs.
Second, watch falloff before adding a second source. Look at the nearest and farthest face, then inspect the background. If the brightness problem comes from distance, another light may only hide the cause while adding more spill and more stands.
Third, confirm white balance and shutter speed before the first frame. Mixed daylight, LEDs, and strobes can make a room look consistent to your eye while producing different color across the set. A gray card and a deliberate sync-speed check take less time than repairing every image later.
Use the rooms as practice, not just bookings
The rise loft studio gives you a controlled place to test a modifier swap, a V-flat, or a boom position. The lounge walls are useful for practicing bounce setups during a lunch break, especially when you want to learn how cream surfaces change the shadow side.
Keep the practice cadence simple:
One portrait session to test direction and softness.
One product table to refine reflections and flags.
One event coverage run to rehearse bounce and background separation.
The exact gear can change from room to room, but the decisions stay stable. Put the source where the face or product needs shape, choose a modifier large enough for the result, and adjust distance before multiplying fixtures. Repeated setup time in Freeform House's rooms is what turns a checklist into instinct.
Freeform House offers members flexible rooms, the rise loft studio, coworking space, and content resources that support portraits, products, meetings, and events in one working environment. Visit Freeform House to see how the space can help you practice a repeatable photography lighting setup before your next client shoot.
Comments